Hands on guide to Google Cloud
This page builds on the first steps guide and describes a simple deployment of Etherpad to Google Cloud.
Warning
This page covers a rapidly changing topic. Reader beware. This page is correct as of July 2025.
It is suitable for those implementing or deploying services who wish to gain hands-on experience with Google Cloud.
Important
This guide will cover the products used and will configure them manually in the Google Cloud console. For production services tools such as terraform should be used to automate deployments using a product admin service account which has been created for you.
Prerequisites
This guide assumes some basic familiarity with the Unix command line either via Linux or via Max OS X.
Before following the instructions on this page, make sure that the steps in the first steps guide have been performed so that your account has been set up to access Google Cloud.
You must have installed Docker to follow this guide. If docker is installed correctly you should be able to run the hello world image:
$ docker run hello-world
Unable to find image 'hello-world:latest' locally
latest: Pulling from library/hello-world
0e03bdcc26d7: Pull complete
Digest: sha256:7f0a9f93b4aa3022c3a4c147a449bf11e0941a1fd0bf4a8e6c9408b2600777c5
Status: Downloaded newer image for hello-world:latest

Hello from Docker!
This message shows that your installation appears to be working correctly.
...
You must have installed the Google Cloud SDK to follow this guide. Make sure that you have authorised the Cloud SDK to access your account. If the Cloud SDK is properly installed, you should see your G Suite account in the list of "credentialed accounts":
$ gcloud auth list
                          Credentialed Accounts
ACTIVE  ACCOUNT
*       spqr1@cam.ac.uk

To set the active account, run:
    $ gcloud config set account `ACCOUNT`
Create a Google project
Visit the Google cloud resource manager. If you've been added as a product admin, you should see a product folder and a meta project within it. If you're an admin on multiple projects, you'll see multiple product folders. In this guide we'll be using a product called "Example" which appears in the resource manager as follows:
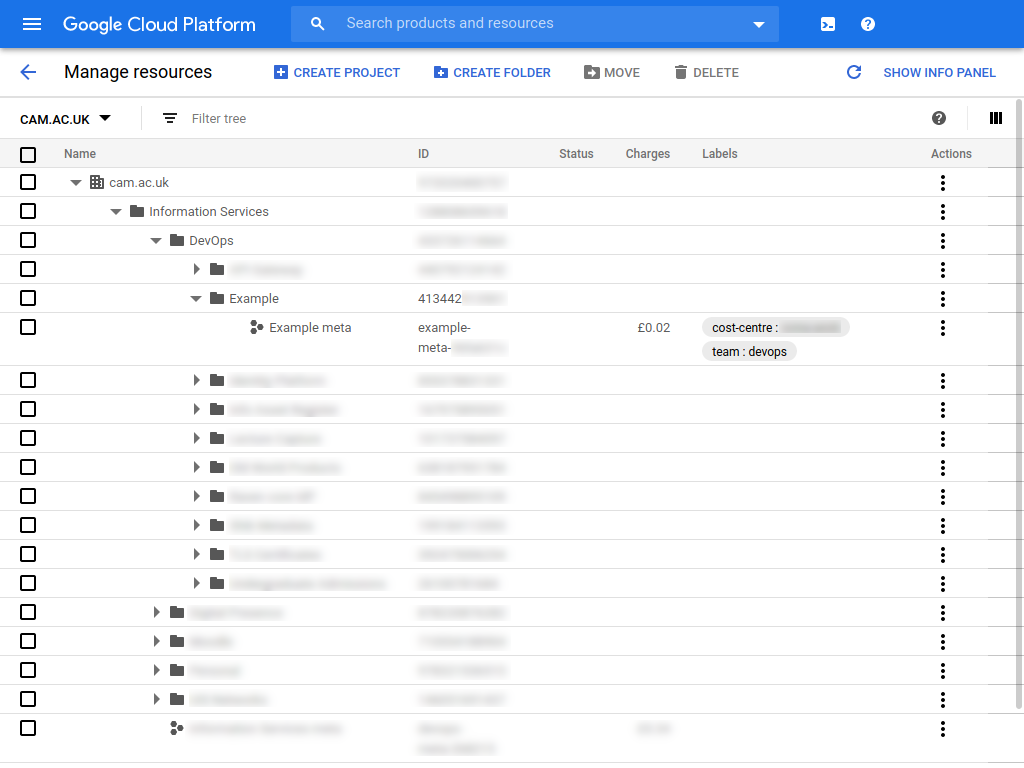
In the resource manager, you can see the name of the product folder, it's numerical "folder id", the UIS cost centre code associated with the product and the team managing the product.
A Google cloud project collects related cloud resources together. Usually there is one project per environment, for example "production", "staging" and "development". An environment is a stand-along deployment of a product which is independent of the others.
Generally you will have at least a "production" and "staging" project within the product folder. In this guide we'll be just be creating one project as an example.
Info
The meta project which has been created for you holds resources used to manage the product folder hierarchy itself or resources which are common across all environments. Usually you won't be creating resources in the meta project.
Click Create Project and fill in the following details:
- For Project Name use "Etherpad Example"
- Click edit next to the project id.
- For Project ID use "etherpad-xxxxxx". This name has a randomly generated suffix since project names in Google Cloud must be globally unique.
- For Billing account, make sure that "Billing Account for cam.ac.uk" is selected.
- Check that Organisation is "cam.ac.uk".
- Click Browse next to Location and select the product folder which was created for you.
- Click Create.
Danger
TODO: this currently won't work since we have disabled manual creation of projects by virtue of disabling Google Cloud access in G Suite. Open question, do we want to allow it for experimentation like this or should the project creation section be re-written to use the gcloud command line tool?
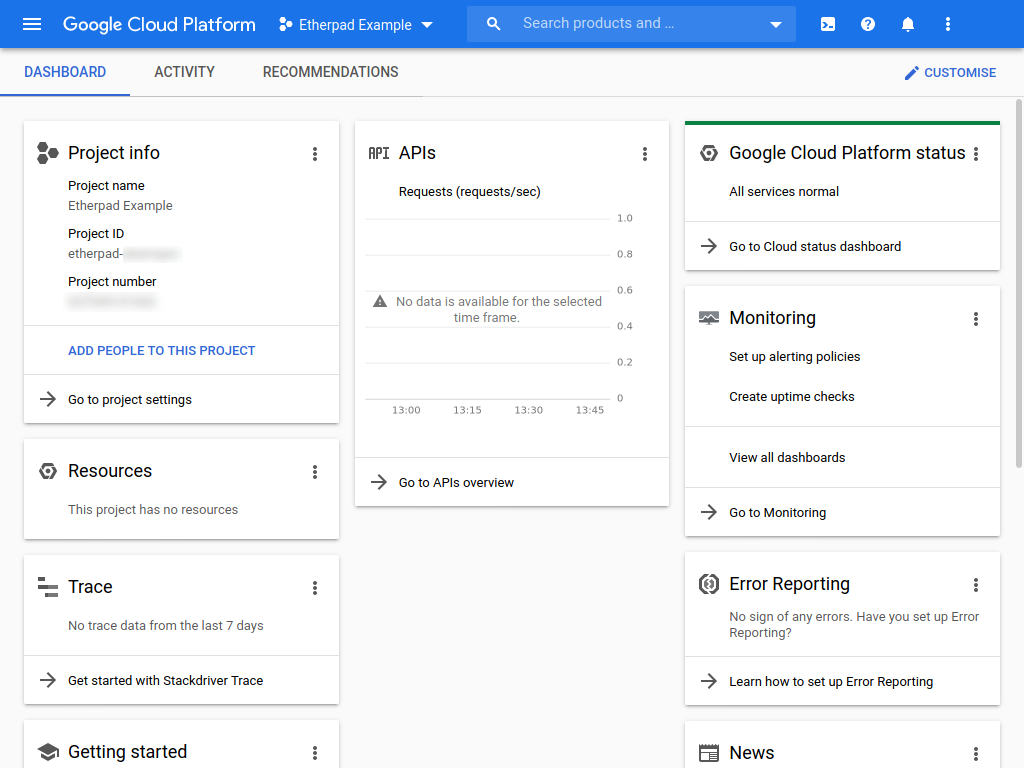
Once project creation has completed, visit the cloud console dashboard. Make sure that the "Etherpad Example" project is selected via the drop-down menu in the top bar next to Google Cloud Platform. The dashboard should look like the following:
Take a look at who can create resources in the project
Google has a unified Identity and Access Management (IAM) system for all its cloud products. In this model identities are granted roles on resources.
An identity can be a G Suite account or a service account which represents some automated process. A role defines what actions that identity can perform and a resource represents some individual cloud product or a resource within the product.
If you go to the IAM page for your project, you should see something like the following:
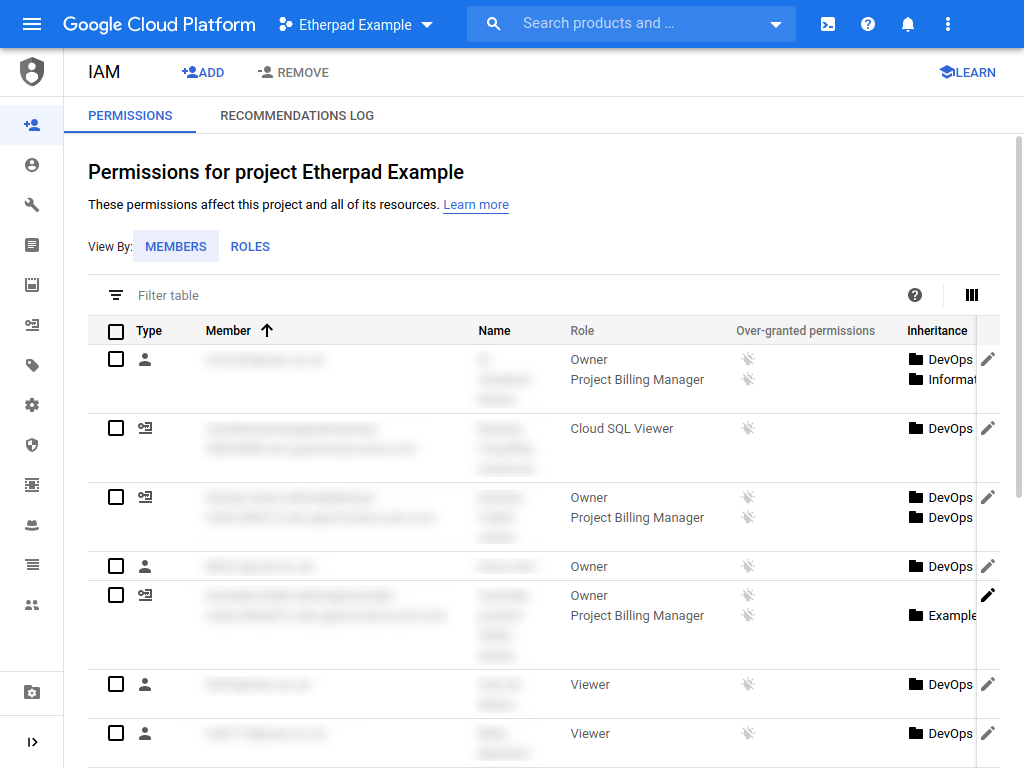
This page lists the G Suite users and the service accounts which have some role granted on your project and what the role is. The Owner role is granted to all product administrators; they can create, modify and delete all resources within the project.
Deploy a web application
Google Cloud has a container hosting product named Cloud Run. It is based on the Open Source Knative serverless platform.
Info
A container is a way of packaging software. If a web application is packaged in a container, it can be installed and run on many different container host services. You may be familiar with other packaging formats such as Deb, RPM, MSI or OS X ".pkg" files.
As long as your web application has been packaged in the right way, Cloud Run can host it for you without you having to worry about installing virtual machines or managing OS upgrades.
We'll start with deploying a simple "hello world" container.
Visit the Cloud Run console and make sure "Etherpad example" is selected in the project drop-down next to Google Cloud Platform.
Click Create Service and select the following:
- For Deployment platform make sure that Cloud Run (fully managed) is selected.
- For Region, select europe-west1 (Belgium). (As of writing, the London region was not available for Cloud Run.)
- For Service name, enter "etherpad".
- For Authentication, select Allow unauthenticated invocations.
- Click Next.
- For Container image URL, enter "gcr.io/cloudrun/hello".
- Click Create.
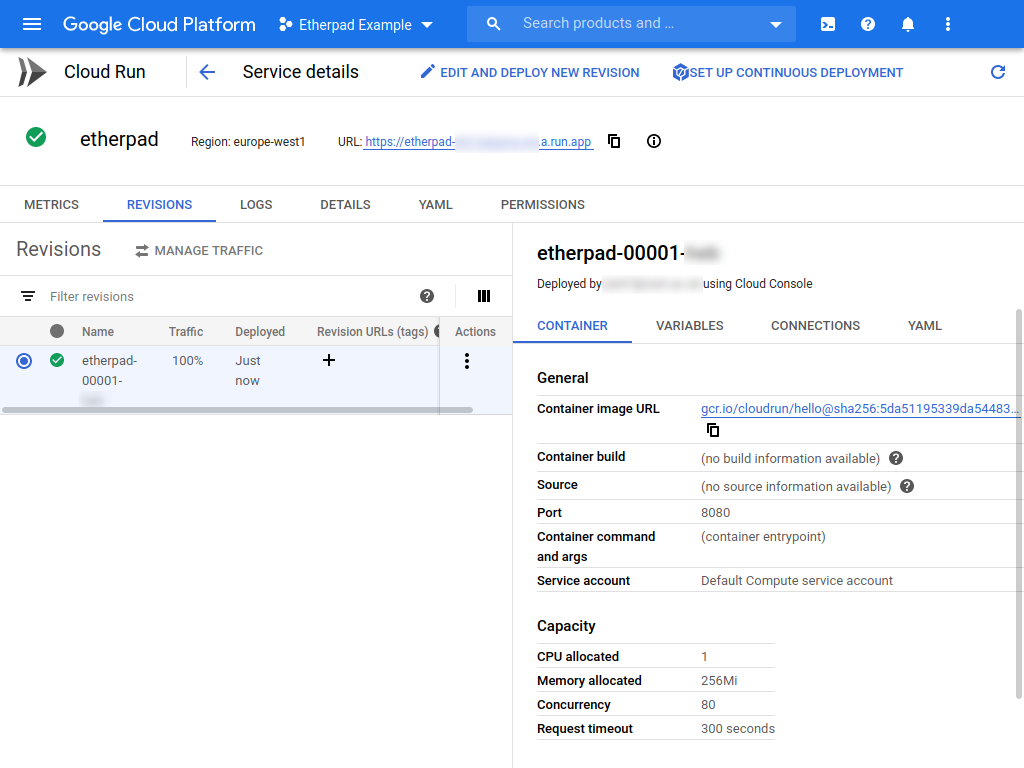
Cloud Run will start deploying your service. After a short while you should see a service details page similar to the following:
Click on the link next to URL which ends in ...a.run.app and you should be
presented with a unicorn showing that you've deployed a web service.
Deploy a custom etherpad image
Above we used a pre-built Docker container to deploy a web application. We'll now create a custom etherpad image.
Google Cloud has its own container registry which is used to host container images. Before you can make use of it, make sure that your machine is set up to be able to use docker to push and pull images:
$ gcloud auth configure-docker
Create an empty directory called "etherpad" on your machine and create a Dockerfile within it:
$ mkdir etherpad
$ cd etherpad
$ echo "FROM etherpad/etherpad:1.8.4" >Dockerfile
This is the smallest possible Dockerfile. It says "start from etherpad's official Docker image and do nothing more".
Your project's Docker registry lives at eu.gcr.io/etherpad-xxxxxx/.
Make sure you're in the etherpad directory you created above and build the
etherpad image via docker build --tag eu.gcr.io/etherpad-xxxxxx/etherpad ..
If the image has built successfully, you should now be able to push it to
Google's container registry viadocker push eu.gcr.io/etherpad-xxxxxx/etherpad.
Go back to the Cloud Run service details page and click Edit and deploy a new revision. Change the service details to read as follows:
- Container image URL should be changed to "eu.gcr.io/etherpad-xxxxxx/etherpad".
- Under Capacity change Memory allocated to 512MiB. The full etherpad application required more memory than a simple unicorn image(!)
- Click the Variables tab.
- Under Environment variables click Add variable.
- Add a variable with the name
TRUST_PROXYand the valuetrue. - Click Deploy and watch your etherpad application deploy.
Info
If the deployment fails, you can look at logs from the application via the logs tab on the service details page.
Click the link next to URL once again and you should have an etherpad instance. Click New pad and check that you get a new pad:
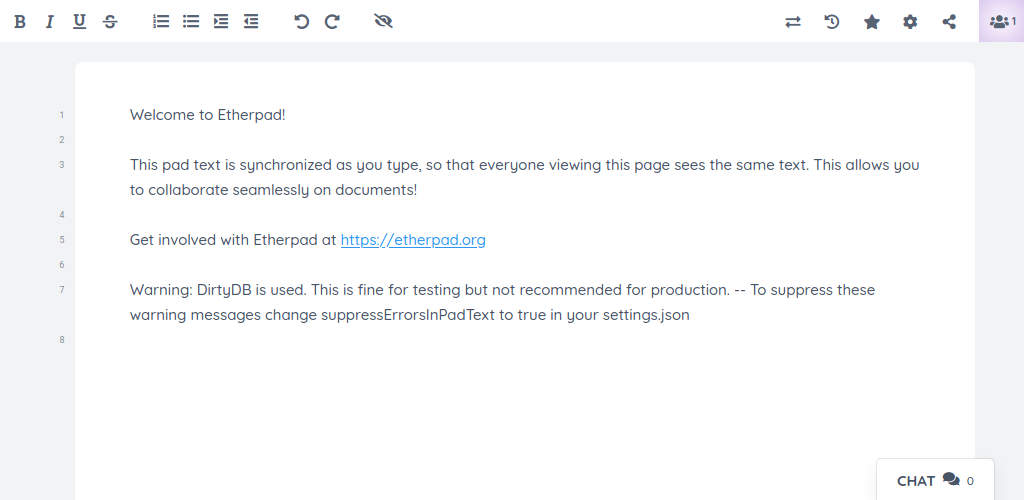
We used an environment
variable to configure the
application. Environment variables are passed into the container and can be used
by the application to change its behaviour. In this case we are using the
TRUST_PROXY environment variable from the container
documentation.
This will cause etherpad to trust Google when it says that the application is
being hosted over HTTPS.
Create a database instance
Although your etherpad image has been deployed, it is not yet fully functional. The default pad text suggests this:
Warning: DirtyDB is used. This is fine for testing but not recommended for production. -- To suppress these warning messages change suppressErrorsInPadText to true in your settings.json
DirtyDB is a simple filesystem-based database. What is going on behind the scenes is that when the first request for your application comes in, Cloud Run finds a machine to run it on, deploys the container and starts directing traffic to the container. If traffic increases, more containers are deployed and if traffic decreases, fewer containers are deployed. If there is no traffic, Cloud Run will remove all the containers.
The etherpad container writes state to the local filesystem. This is a problem when Cloud Run adds more containers: each container will have a different database. It is even more of a problem when Cloud Run scales back to zero containers. Then the entire database will be deleted(!)
Containers should be stateless. That is to say that they shouldn't rely on storing state in memory on on disk which may be needed from one request to another.
We're going to add a small PostgreSQL database instance to your project which will be used to store state. This is provided by a product called Cloud SQL.
Go to the Cloud SQL console and click Create instance and then click Choose PostgreSQL. Wait a a few moments for cloud resources to be created behind the scenes and then provide the following values:
- For Instance ID use "sql-xxxxxx". In this example we use a random id since it can be up to a week before an instance id can be re-used in the same project.
- For Default user password click Generate.
- For Region choose europe-west2 (London) and keep Zone to Any.
- It is OK to leave Database version at the default value.
- Click Show configuration options and then Machine type and storage.
- Drag the Cores slider to the left to select 1 shared vCPU.
- Scroll to the bottom of the page and click Create.
Google will start to provision your database. After a while the provisioning should be complete and you should be looking at the instance's dashboard:
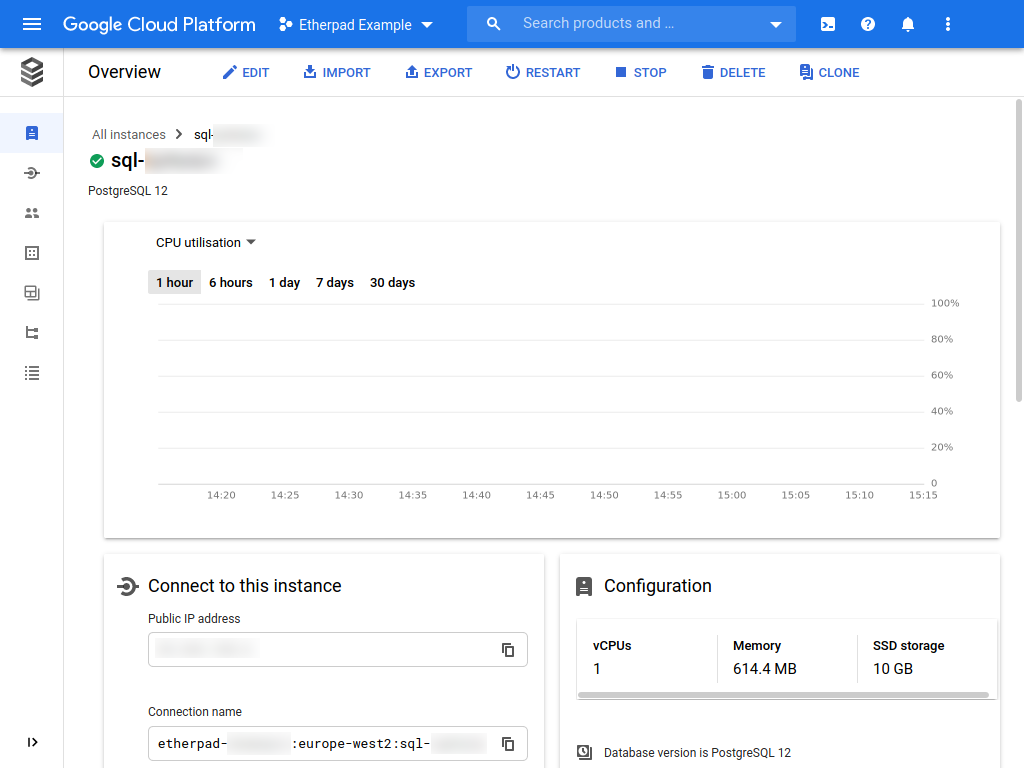
Click the icon at the right of the Connection name box. This will copy a bit of text to your clipboard. Paste it somewhere safe because we're going to use it later.
Important
As we saw above, Google Cloud has its own IAM system which supports service accounts and G Suite accounts. PostgreSQL has its own set of users called "database users".
We need to create a database within our database instance for the web application to use. Hover over the left-hand side of the instance dashboard and click Databases. Click Create database.
- For Database name, use "etherpad".
- Click Create.
We'll also need to create a database user for the web application. Hover over the left-hand side of the instance dashboard and click Users.
- Click Add user account
- For Username, use "etherpad".
- For Password, choose a strong password and make a note of it. We'll need it later.
- Click Add
Create a web application service account
By default no cloud products are allowed to connect to the database instance. Each product has an associated service account identity. In this section we will create a service account and grant it the ability to connect to the database instance. In the next section we will change the Cloud Run service so that it runs as that service account identity.
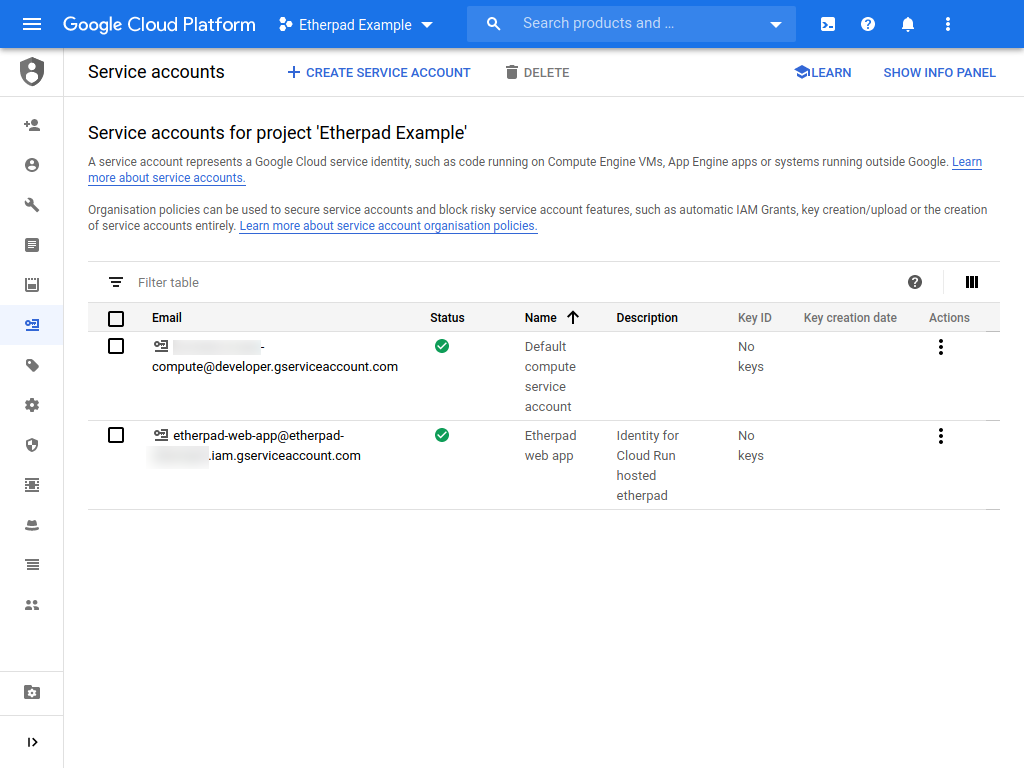
Open the service accounts console for your "Etherpad example" project and click Create service account.
- For Service account name use "Etherpad web app".
- For Service account ID keep the default "etherpad-web-app".
- For Service account description use "Identity for Cloud Run hosted etherpad".
- Click Create.
You will now be asked to grant the service account some permissions. We want it to be able to connect to our Cloud SQL instance.
- Click on Select a role and type "Cloud SQL".
- Select Cloud SQL Client from the list.
- Click Continue.
- We don't need to grant any users the ability to act as this service account to click Done.
You should now see the new service account in the list of service accounts:
Enable the Cloud SQL API
Cloud Run will use the Cloud SQL API to connect to the database instance and so we need to make sure it is enabled. Visit the API library console for the "Etherpad Example" project and type "Cloud SQL Admin" in the search box.
- Click Cloud SQL Admin API from the list of results.
- Click Enable if the API is not yet enabled.
Connect the database to the web application
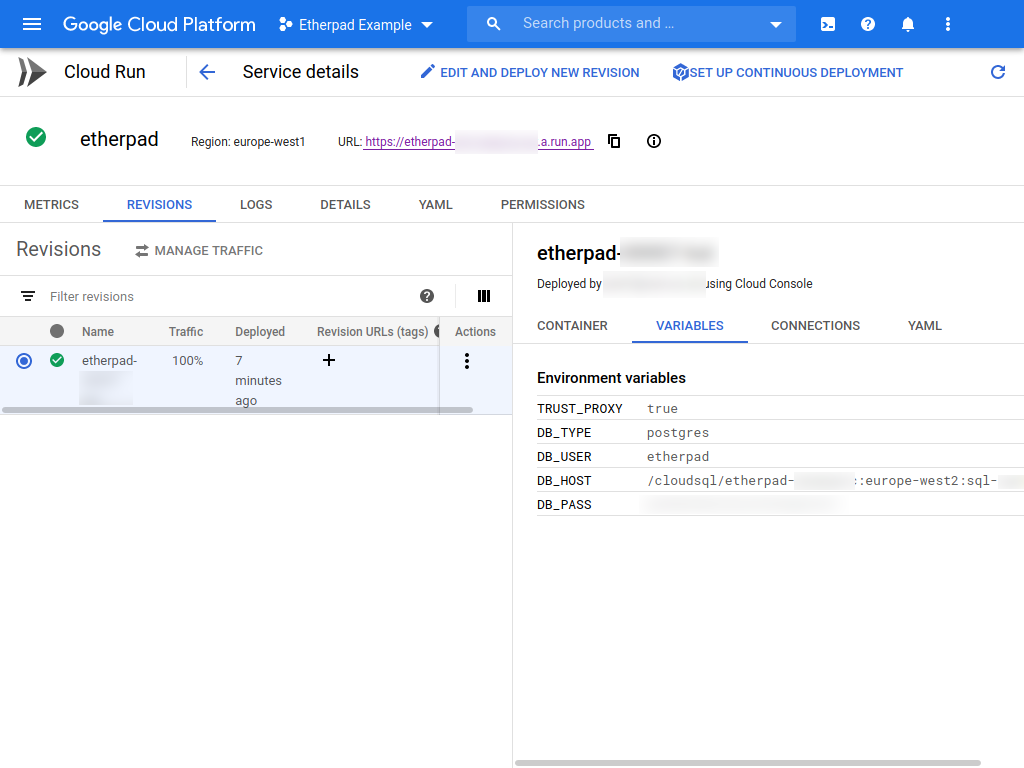
We now need to connect the database instance to the Cloud Run service we created. Go back to the Cloud Run console and click on etherpad in the Name column. You should be back at the service details page.
- Click Edit and deploy new version
- Under General click the drop-down under Service account and choose the Etherpad web app service account.
- Click the Connections tab.
- Under Cloud SQL connections click Add connection.
- Click on the drop-down box and select the instance. The connection string should match the one you saved when creating the instance.
- Click the Variables tab.
- Under Environment variables click Add variable.
- Add a variable with the name
DB_TYPEand the valuepostgres. - Continue adding variables to match the following table.
| Name | Value |
|---|---|
TRUST_PROXY |
true |
DB_TYPE |
postgres |
DB_USER |
etherpad |
DB_NAME |
etherpad |
DB_HOST |
/cloudsql/etherpad-xxxxxx:europe-west2:sql-xxxxxx1 |
DB_PASS |
Password for etherpad user created earlier |
/cloudsql/
placed at the beginning.Click Deploy and check that your new instance deploys correctly.
Info
If the deployment fails, you can look at logs from the application via the
logs tab on the service details page. In particular check that the
DB_HOST and DB_PASS environment variables are correct.
Click the link next to URL and choose New pad. Verify that the message about DirtyDB from before is no longer present.
Congratulations! You have deployed an etherpad instance which will auto scale with demand. Etherpads update in real time as people edit them. Send the link of a pad to a colleague and try collaborating on a note.
Using secret manager
Our deployment works but we can improve the security a bit. If you look at the service details page and click on the Variables tab, you can see all of the environment variables set for our service. This includes the database password in plain text!
In order to protect the database password we are going to use Google Secret Manager.
Secret Manager is a product which securely encrypts secrets and allows the set of IAM identities which can read and write the secret to be limited. We'll use secret manager to store the database password and configure it so that only the etherpad web application service account can access it. Then we'll update the deployed service to use secret manager.
Visit the secret manager console. You may be prompted to enable the Secret Manager API. Do so if asked.
- Click Create secret.
- For name, use "etherpad-db-password".
- Paste the password for the "etherpad" database user in Secret value.
- Under Regions, check Manually select regions.
- Click the region drop-down, check europe-west2 and click OK.
- Click Create Secret.
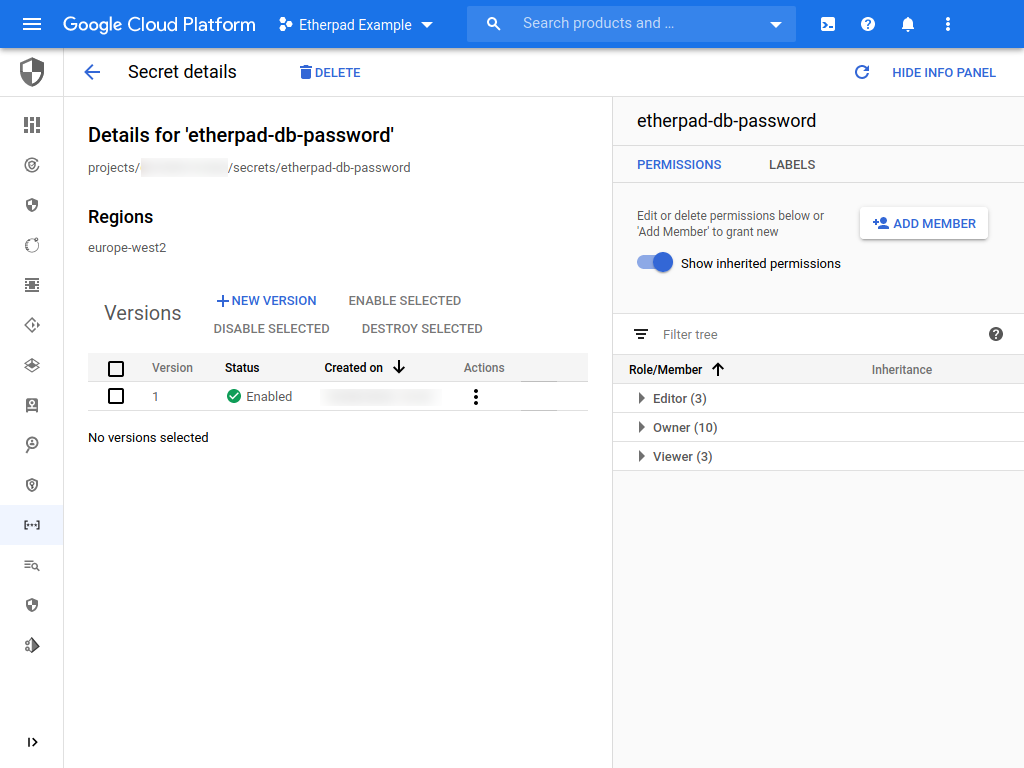
You will now be taken to the secret details page for the secret. If a panel is not shown on the right click Show info panel. Your screen should now look like the following:
We want to give the etherpad web application service account permission to read the secret. This involved giving the service account the "Secret Manager Secret Accessor" role.
- Click Add member.
- In New Members, paste in the email address of the etherpad web app service account. If you don't have it to hand, you can copy it from the service account list page.
- For Role, select Secret Manager Secret Accessor.
- Click Save.
Updating the etherpad image to load secrets
The official etherpad image will not load secrets from Secret Manager directly. Instead we can make use of a utility called berglas to transparently access secrets.
One of berglas' features is the ability to automatically place Secret Manager
secrets in environment variables. If an environment variable has the value
sm://[PROJECT_ID]/[SECRET_NAME] berglas will fetch the secret and replace the
environment variable's value with the secret's value.
We can "wrap" the etherpad server in berglas by updating our Dockerfile. We'll install berglas and its dependencies and change the entrypoint to use berglas.
Go back to the directory containing your custom Dockerfile and update it to read as follows:
FROM etherpad/etherpad:1.8.4

# The official etherpad image runs as the "etherpad" user. Become root to
# install some other software.
USER root

# Berglas needs to use the system CA root store to verify that it is talking to
# Google's APIs.
RUN apt-get -y update && apt-get -y install ca-certificates && apt-get clean

# Download and install berglas.
ADD https://storage.googleapis.com/berglas/main/linux_amd64/berglas \
        /usr/local/bin/berglas
RUN chmod oug+rx /usr/local/bin/berglas

# Go back to running stuff as the etherpad user.
USER etherpad

# Wrap the old entrypoint in berglas.
ENTRYPOINT ["/usr/local/bin/berglas", "exec", "--"]
CMD ["node", "node_modules/ep_etherpad-lite/node/server.js"]
As before, build the etherpad image via docker build --tag
eu.gcr.io/etherpad-xxxxxx/etherpad ..
Once the image has built, push it to Google's container registry viadocker
push eu.gcr.io/etherpad-xxxxxx/etherpad.
Let's first verify that we've not broken anything. Go back to the Cloud Run console and click on etherpad in the Name column to get to the service details page for the etherpad webapp.
Click Edit and deploy a new revision and then click Deploy. This will deploy a new version of the app using the latest image which was pushed. Check that the app still works.
- Click Edit and deploy a new revision again.
- Click the Variables tab.
- Change the
DB_PASSvariable tosm://etherpad-xxxxxx/etherpad-db-password. This URL is formed from the id of the Example project and the name of the secret. - Click Deploy.
The deployed etherpad application should work just as before except that it is using Secret Manager to fetch the database password when it first starts.
Cleaning up
Since Google groups all the resources we've used under a single project, it is easy to clean up after ourselves and delete everything we created. It is good practice to get into the habit of clearing up after yourself after experimenting to avoid incurring unnecessary costs.
Go back to the Cloud resource manager page and find the project you created at the start of this guide.
- Click the three vertical dots in the row corresponding to the project.
- Click Delete.
- Enter the project id "etherpad-xxxxxx" to confirm that you want to delete the project. DO NOT DELETE THE META PROJECT.
- Click Shut down.